
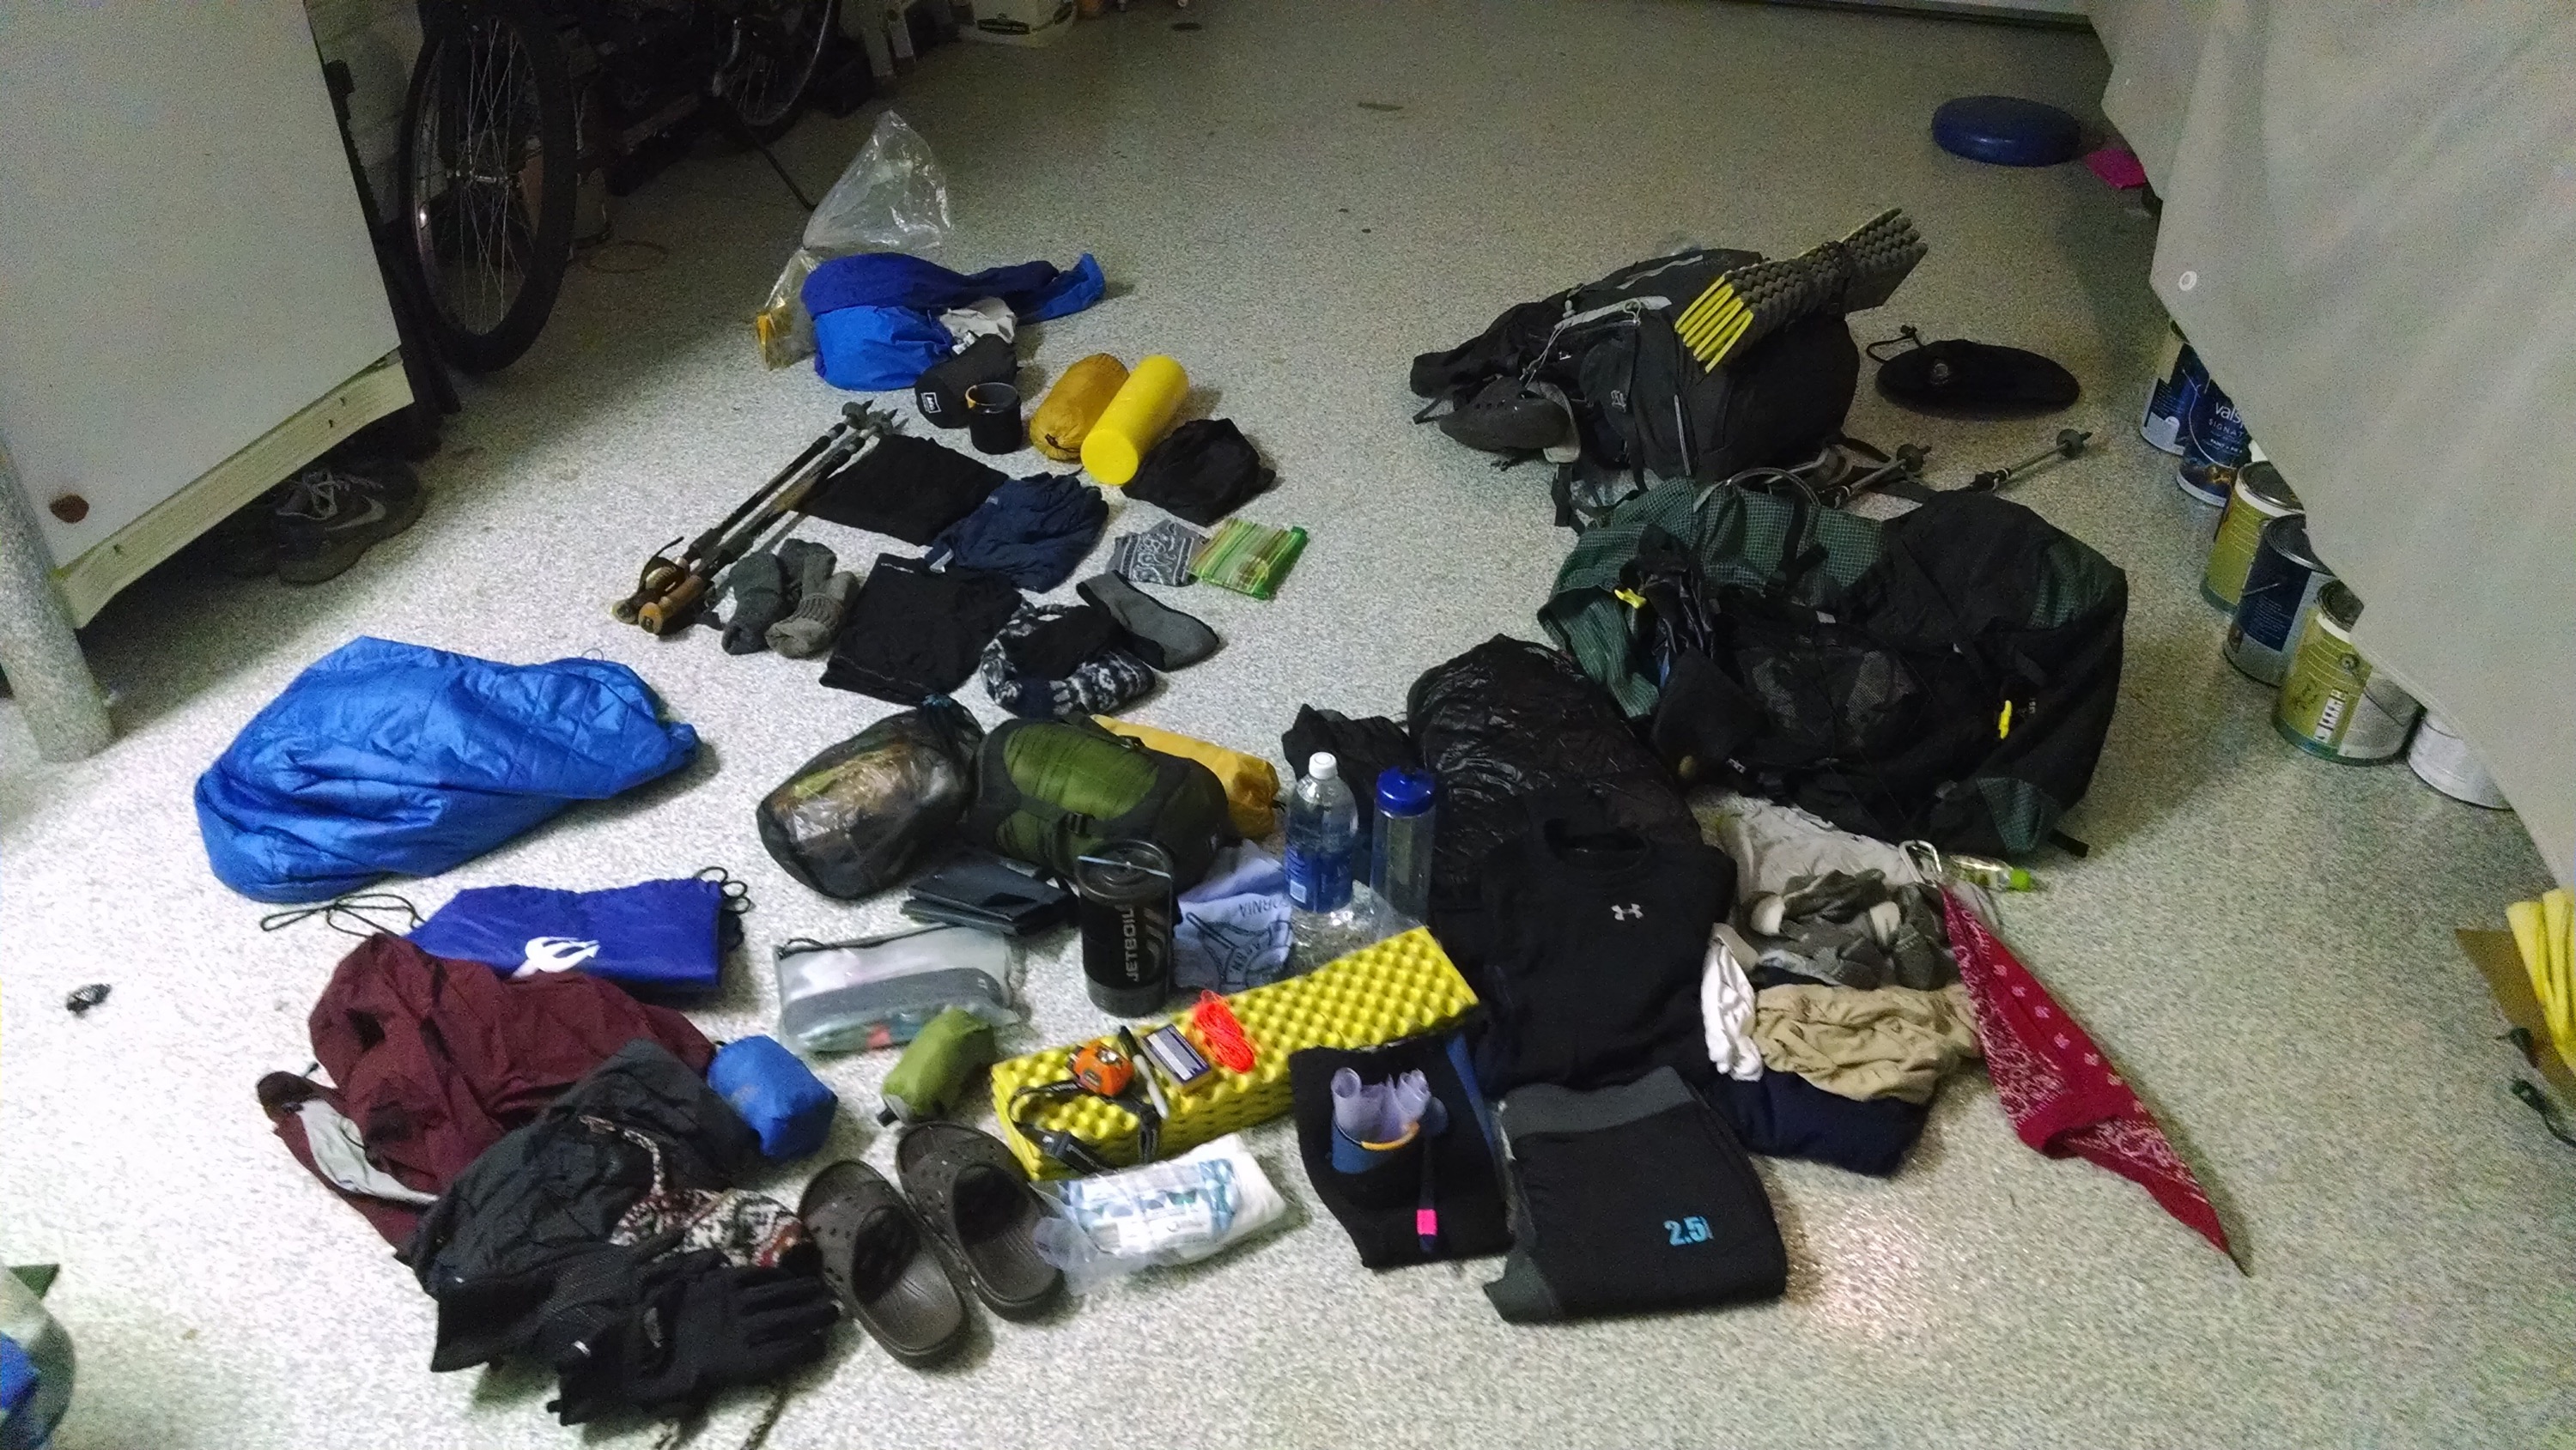
Stuff we started with
It’s been a little over 3 months since we have completed our thru-hike of the PCT, and high time we give a review of what we carried and found useful, as well as if we had it to do all over again, the changes we’d make. So let’s talk big items first.
Tent: We went through three different sleeping arrangements. We started with the tent we used when we did the Tahoe Rim Trail (TRT) in the summer of 2013, the Six Moons Design Lunar Duo. It’s one of the roomiest, light-weight two person tents we’ve found. We loved the double doors and large vestibules. The interior was so roomy that if you wanted to bring your packs inside (because of rain/snow) you could with little discomfort. It’s downfall however, is that if you fail to find a perfectly flat spot to set up on, you’ll find yourself waking up on the “downhill” side door and trekking pole. You also need two people to set this up if there is any wind. We considered bringing a small level with us on this trek, but didn’t, therefore our tent site prep consisted of us surveying the area like Tiger Woods trying to sink a 20 foot put…it was laborious. On the good side, the tent held up remarkably well during our 2nd night on the trail of nearly gale force winds and heavy downpour that morphed the next night into snow. We later however, jettisoned the tent in favor of cowboy camping with an MSR E-Wing tarp (just in case), as there appeared to be no more weather events on the near horizon, and we were looking to reduce weight, and the time it took to bed down for the night.
long.
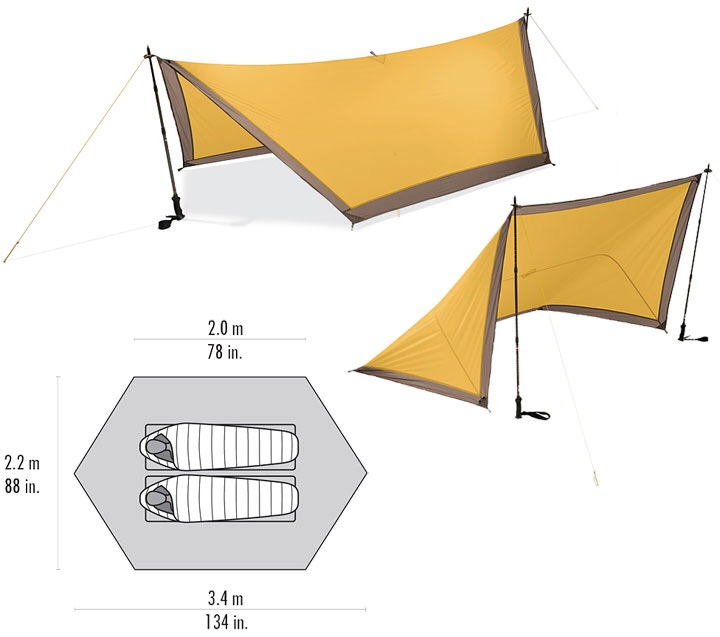
The MSR E-Wing worked well for us and we used it a handful of times namely for a wind block to allow for a warmer night’s sleep, and when we camped near water sources, to combat the “lake effect” and guard against morning dew. This worked splendidly, unless one fails to plan for a late night assault by industrial strength sprinklers (see our post regarding Lake Silverwood). When we got to Kennedy Meadows we traded in our tarp for a Big Agnes Angel Springs 2 (2lbs7 oz).
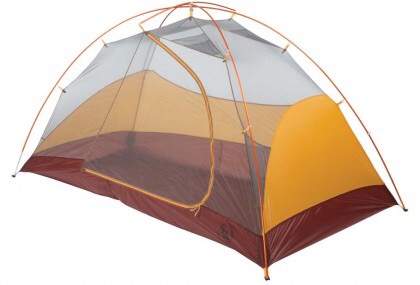
This is a light weight, free standing tent. Paul wanted to stay with the tarp and cowboy camping, however I sleep cold and remembering our dealings with mosquitos the year previous when we hiked the Tahoe Rim Trail, would rather have the option to retreat to the warmth and protection of an enclosed temporary structure…I won! This turned out to be a great tent especially with the snow storm that hit the Sierras just prior to our entrance, and the heavy rain we had along the way, to include our last night on the trail. We would, however, have liked double doors, but you can’t beat the inside roominess for two nearly 6ft adults with wide shoulders. With regard to the weight, the added 2 lbs, when you separate the tent poles and tent body it worked out to one pound for each of us, which was negligible considering the 8-12 lbs (each) of water weight we no longer had to carry, as water was now plentiful. There were nights when we still cowboy camped though.
Sleeping Bag: Western Moutaineering Alpinelite down fill 20 degree bags. These bags worked great. Had I had a zero degree bag in the Sierras, I may have been talked into staying with the tarp. We “water proofed” the exterior of our bags, and had one left and one right zip zipper which allowed us to zip our bags together during particularly cold nights (in the teens) and to create a “quilt” of sorts for warmer nights. If we had to do it over again, and used a tent the whole time, we would consider using a quilt as this was the most comfortable sleep system for us.
Sleeping Pad: We started with the 1.5 lbs ExPED UL7 (long), which was supremely comfortable. In hind sight we would not have gotten the long pads as they were not necessary. A 3/4 pad would have sufficed, but ExPED does not make one. We later switched to the REI Flash which was a half pound lighter than the UL 7 namely because Paul’s ExPED valve failed and flattened on him, and REI did not have one in stock when we were at the store when home for a resupply. We could have had one mailed to our next resupply, but then Paul would have had to use his Thermalite pad, that we use as sit pads, for another week. Even the doubling of mine and his was not as comfortable as the air pad, and a good night’s sleep is supremely important when thru hiking.
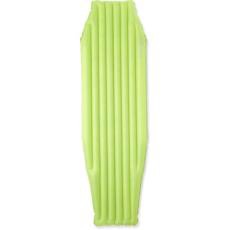
To reduce weight, I switched to the REI Flash as well (ounces do add up). As a modification to both sets of pads, we applied “dots” of silicone on both sides to keep the pads from slipping on the slick tent floor and to keep our bags in place as we slept.
Back Packs: One thing we learned is that light weight packs for the sake of going light weight is not necessarily the best way to go. Before our trek, I switched out from my Gregory 70L Diva, whose supsension system I LOVED and was Cadillac comfortable but weighed over 5 lbs…empty, in favor of a ULA Catalyst. For the most part it worked well for me, and was very user friendly with the hip belt pockets and side access to my water bottles. As I lost weight, so went my “padding” and the aluminum stays that keep the pack “ridgid” began to press on my sciatic nerves which only served to increase the discomfort that I was already in from walking 20+ miles a day, with all my crap on my back. This pack lays flush with your back and does not allow for airflow between your back and the pack. This led to a seriously painful case of “pack rash” whose pain was on par with childbirth. While I sweat profusely when I exert myself, the rash did not appear until we got out of the Sierras. I suspect it was the buildup of salty sweat on the padding of the pack, and the coarseness of my well worn shirt that caused the rash to come about, so I washed my pack and bought a new shirt, but the pressure on my sciatic nerves continued and the rash, while reduced, never really went away. It got so bad that for temporary relief, Paul and I switched packs. Paul declared my ULA a “pillowcase with straps” and decided that once we got into Ashland I needed to get a new pack. Paul kept with his Osprey Atmos 65. He found it comfortable and sturdy. In Ashland, I got fitted for a new pack, an Osprey Exos 58.(If I was smarter, I could have gotten away with a Exos 48 which would have made me get rid of some stuff I deemed “essential”, but in all reality was not). Turns out it was just not that much heavier than my ULA Catalyst, but the comfort and relief in the form of allowing my back to “air out” was a game changer.
Footwear: (Note: I generally wear Men’s shoes, with the exception of dressy shoes and/or heels, I find Men’s tennis shoes and hiking boots to be wider in the toe box and, frankly, sturdier in the long run) I started with Salomon GTX 4D (the ones I trained in ), only a 1/2 size bigger, and found by the time we limped into Mammoth that they were now a 1/2 size too small. In Mammoth, they did not have my size of the Salomons and I got talked into trying the Merrill Moab. I grew to hate these shoes, and switched back to Salomons once we got into Truckee, but a low cut, light weight pair of the XA Pro 3. Loved these shoes. It is something about the fit and cut of the Salomon line of footwear that works for me. From here I decided that I would stay exclusively with Salomon footwear products. Their warranty is unbeatable as well, which we didn’t realize until Seiad Valley, when Bomber upon admiring our similar footwear, told us about the warranty. Salomon’s warranty is for 2 years. Within a month and 600 miles later, holes had appeared on the sides of my shoes and the tread had torn. Salomon replaced them, mailing me a new pair. Due to spotty WiFi, this took a little bit to complete the correspondence and pick an appropriate location to have them shipped to. As a result, in Medford Oregon at the the REI, and seeing that most of Oregon was of “softer” tread, I tried out a pair of Salomon XT Wings 3. Love these shoes. In fact I just bought a new pair, and will most likely wear these for the Camino de Santiago, later this year (2015). Once I reached Steven’s Pass, my new Salomon XA Pro 3 arrived…just in time for the final push to Canada. Turns out I replaced my shoes about every 5-600 miles, and in total went through 5 pairs of shoes. Things I would change… (1) I would have read the fine print and been aware of the warranty policy for my Salomons and planned accordingly. (2) For the section up till Kennedy Meadows I would have worn the Wings 3, but still would have worn the GTX 4D for the Sierras. I liked the stability of the high cut, and the stiffer sole for the uneven and sharp terrain. The “water-proof” aspect of the boot kept my feet dry and warm which was especially important for the hundreds of miles of snow and ragging rivers we found ourselves walking through. (3) Minus the snow, I probably would have worn the XA Pro 3 through the Sierras and Washington. Paul started with Oboz Sawtooth. Unfortunately, he failed to size up from the beginning and paid for it dearly. By the time we got to Mammoth (actually before), he was considering walking in his Crocs or barefoot, his feet hurt so bad from too small of shoes. In Mammoth, he succumbed to trail “peer pressure”, and bought a pair of Brookes Cascadia…and they were orange mind you. He found these shoes to be considerably lighter than his Oboz, and very comfortable. The one thing he noticed was that the soles were not as stiff and rugged as his Oboz, and after a while, as their tread began to wear out, he felt every rock on the trail. In Medford, at the REI, I talked him into the Salomon XA Pro 3, and hes’s been a convert every since. He too went through 5 pairs of shoes. If he had it to do all over again, he would have chosen and stuck with the Saloman XA Pro 3 for the entire trip, with the exception of having to tromp through the snow in the Sierrra, he would still wear his Oboz, only a size bigger having thus learned his lesson. Bear in mind as we enter 2015, these specific shoes have morphed into “new” designs/colors, but the fit, wear and ruggedness of Salomon shoes, for us, continue to be our “go-to” footwear.
Resupply: Shipping boxes to ourselves worked great, and even better was having a friend who could pull out stuff you were tired of, and put in surprise goodies. Things we would NOT ship again. Candy (the bars were too small the closer to Canada we got), toilet paper (baby wipes ended up being the ONLY way to go), toothpaste, toothbrushes, shampoo/conditioner, OATMEAL and most breakfast meals. We found that Candy and breakfasty food items were easier to get in town as our tastes changed along the way. In hindsight we would have purchased and shipped (via REI as shipping for purchases over $50 is free) every dinner, rather than trying to be “creative” during our in-town resupplies. This left us hating Idaho mashed potatoes no matter the flavor. As far as lunches, we are just beginning to eat tuna again, but we have not been able to choke down jerky as of yet. Considering my bout with Giardia, cheese and most dairy products are no longer friends of mine. Having packages shipped to us gave us more “down-time” in town, allowed for Neros, and frankly it’s just fun to open a package addressed to you.
Cooking: Our JetBoil worked wonderfully. The ignition system failed on us after awhile, for which REI switched us out for a new one, but a lighter worked fine in the interim to get the stove flamed up. With the JetBoil we did not have to carry a pot or cooking utensils. We found a 4oz fuel canister worked for 16 uses, and a little less (10) at high altitude in the cold of the Sierras. Granted we could have gone “cook less” to reduce the weight, but there is something about a hot cup O’ Joe (Starbucks Via is the only way to go),or a hot meal that helps with morale.
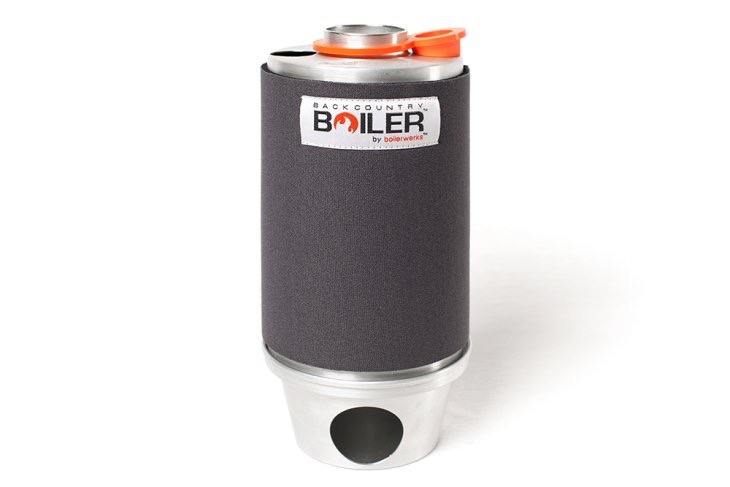
Paul, has found a Boilerwerks Backcountry stove (a Chimney kettle) that he is looking into for our next trip, whose weight is negligible (8oz empty, carries 23 oz of water), and that does not require one to carry fuel per se. We also used a titanium cup with a homemade neoprene sleeve and long plastic spoons. Don’t forget the lip-saver attachment or you will burn your lips, and duct tape only works for so long…on the cup, not your lips.
Clothing:
Pants: We liked and used the option of zip-off pant legs.
Shirts: Our ExOfficio long sleeve bug shirts worked wonderfully. They were lightweight and cool with the sleeves up and provided protection from the sun and bugs with the sleeves down.
Sleep wear: We carried a light wool shirt and I had a pair of light nylon shorts for sleepwear. I also carried and used my Western Mountaineering “puffy pants” for warmth enhancement the entire way. Paul was fine is his underwear. For me they were worth the “extra” weight, for our numerous cold nights, and when I didn’t need them to keep me warmer, they worked great as a down pillow. We initially carried “sleep socks”, but found them unnecessary
Jacket(s): We wore REI Primaloft puffy jackets. If we had it to do all over again, we would chose hooded puffy jackets for added head warmth in our freezing wind conditions and nights we slept with our jackets on. Our rain shells had hoods(Marmot & Acteryx), and were a little heavier than we would had liked but performed perfectly in adverse conditions.
Rain gear: Our outer jackets were our rain jackets and we carried Marmot Precip rain pants. For all the “good” our rain pants did, we would have carried lighter rain pants, like Frog Togs. While our Marmot Precip pants worked well, I think the Frog Togs would have kept us “dry” and funneled the rain into our shoes all the same.
Underwear: ExOfficio all the way. Boxers or Brief…personal choice. Smartwool lightweight hiking socks worked well for us. I used the PhD women’s socks. No liners or cotton socks were used. I carried an additional sports bra, so as to have a dry one to put on in the morning, as mine would often fail to dry completely by morning, and putting on a cold wet bra to start the morning is just NOT fun or a morale builder.
Misc gear: Other gear such as headlamps and knives are a personal preference, but you do not need a mondo light or knife for that matter. A small sharp strong blade, and a light that will allow you to see what you think you need to see will do just fine. Unless you are adept at opening beer bottles with a lighter, we suggest a bottle opener. We absconded with our daughter’s bottle opener ring.
Electronics: We started with a camera, but then dumped it in favor of just using my Motorola Razr Maxx. It has an 8 pixel lens, takes awesome pictures and video, and the pictures posted easily to our blog, which I did from my phone. To charge our phone, we originally had a Goal Zero, and a small 2000mAh power pack, but ditched the Goal Zero in favor of a 7000mAh mobile power pack to charge our phone and Delorme InReach. We found we needed 9000mAh worth of power to keep everything charged sufficiently, so if you can find one around 10000, that would be better. Keeping our phone on airplane mode and putting our tracking to every two hours on our InReach helped with battery life. We have since purchased a PowerGen 12000mAh (246.4g), and will probably take this one with us on the Camino. The downside of not carrying an actual SLR type camera is the fact you can not take good night or time lapse shots. Selfies were only as good as your arms were long.
Maps/Guide Books: We ordered and read Yogi’s PCT guide, and used Halfmile’s Maps, both in paper and electronic forms. We found examining the topography allowed us to better prepare both mentally and physically for each day’s mileage. We had heard so much about the Gutthook app, that we downloaded the app for Oregon and Washington. We found we liked and almost exclusively used the Halfmile’s maps, again both paper and electronic. We found the SIM mode on Halfmile’s app to particularly helpful as well. The mapping link through our Delorme InReach and my phone allowed for a full area overview when looking for “escape routes” with the threat of fire.
One more thing…we started with 3 liter CamelBak bladder and once we reached Mojave ditched them in favor of carrying 2liter Smart Water water bottles. This way you know how much water you actually have, and can refill them without having to dump out the contents of your pack each time you need to “add water”. We, admit, we should have listened to Why Not and switched sooner to the water bottles. We also carried a half liter bottle that we carried in front and used for flavored (G2) drinks. When water was more plentiful, and to save some time, we labeled one bottle as an “X” bottle, which means we did not drink directly from it, and filtered the water later, or used it to cook with for the evening.
Okay, two more things…our first aid kit was fairly big when we started out, but we reduced it to blister bandaids, mole skin, a small but sharp pair of scissors, needle and thread, prescription strength antibiotic cream, a few alcohol pads, industrial strength Naproxen, Ibuprofen and antibiotics which should have included flagyl (as opposed to Cipro) to combat Giardia. A muscle relaxant and some vicodin proved useful a time or two as well. Because of my knee issues, I wore KT Pro tape (black worked the best) for additional support, and carried at least 10 spare strips from each resupply stop.
I’m thinking this should just about cover it. Now to finish putting together our photo montage of our trip and begin the planning of our next adventure…The Camino de Santiago. We will blog for this adventure as well, and will be setting up a separate page, with the same blog address. Stay tuned for 2Moremiles in Spain…this fall. Anyone know a quick way to learn Spanish?

Excellent info, thanks! Funny thing, I just checked your blog a few days ago looking for a gear review tab. Nice timing. Lots of good wisdom – appreciate your insight. We agree – Osprey suspension is the way to go.
It’s awesome to hear that Spain is next on your list. We aspire to that trek as well.
Buen Camino
Do you have a picture of “stuff you finished with”?
I can do that. The blog site was being persnickety with me when i tried to load our ending gear pics. Maybe I’ll just lay it on the ground and take a picture
Did you need/use ice axes or microspikes in the snowy areas?
We used micro spikes through the Sierra snow, especially in the morning when the snow was hard and often icy on the surface. The only time we wish we had an ice axe was going across and down Glenn and Mather Passes. Having an ice axe would of allowed us to feel comfortable to glissade down Glenn Pass, and in our opinion more safely make the approach at Mather Pass, especially for me who is not nimble or quick of foot. On the traverse of Glenn and Mather, I shortened the uphill trekking pole so that I had better stability and strength when planting my pole. Hope that was helpful.
Hi There,
I have liked reading your blog. This is Jeff the fellow who gave you a ride to Yreka when you had Giardia.
I am hiking the John Muir trail this summer and need a reliable way to communicate with the outside world. I remember you were using the Delorme and I am assuming it was the InReach? There is a good chance that my mom might pass when I am on this hike and I need a way to at least get a text message or preferably an email. Since you have hiked this stretch I thought you might know how well this device will work there. My other option would be to get a Sat phone but I would prefer not to.
I hope you keep up your blog again this summer. Happy Trails!
Thanks, Jeff
Jeffrey Buchin 541-890-4409 541-326-0831 (Fax) jbuchin@gmail.com
Jeff, we remember you well. You were literally a life saver. Yes we did use the Delorme InReach SE and it worked splendidly for us. One of the unique features allows you to sync the Delorme with a smart phone and you can text and/or compose or read an email via your phone in airplane mode. The SE is cheaper than the now available Explorer. If we had the choice we would upgrade to the Explorer for the on screen GPS mapping, but the SE is just fine and will do the same things the Explorer does by employing the use of a smart phone. Your choice. There is an activation fee that I believe now can be month to month. If you only intend to use it for the JMT it might be worth getting a used one to save a little coin. In any event we found our device to be extremely reliable and useful. You would have no problems with it on the JMT. Messages send and receive quicker when exposed to blue sky. The same goes for while in your tent if blue sky is overhead. We are excited that you are doing the JMT and hope your trip will be uneventful as it pertains to your mom.
Thanks for the info. Did you have a strategy for keeping your devices charged? Battery pack, solar charger, etc.
Started with a solar charger and we ditched it early on as it was a pain in the ass and not all that reliable. We used a rechargeable battery pack. I’ll text you a picture of it when I get home later this afternoon. We have however bumped up from a 7000 to 12000 battery pack, that way we can go for longer periods (like two weeks or more without having to plug the battery pack in) and be able to keep our phone and Delorme charged